Si bien creemos que los libros y recursos recomendados pueden ser de valor para usted, tenga presente que estas son solo sugerencias y que debe evaluar por su cuenta si los materiales son apropiados y adecuados para su uso. PNC no tiene acuerdo de patrocinio o respaldo con los autores o editores de los materiales enumerados.
ELEMENTO DE ARTE
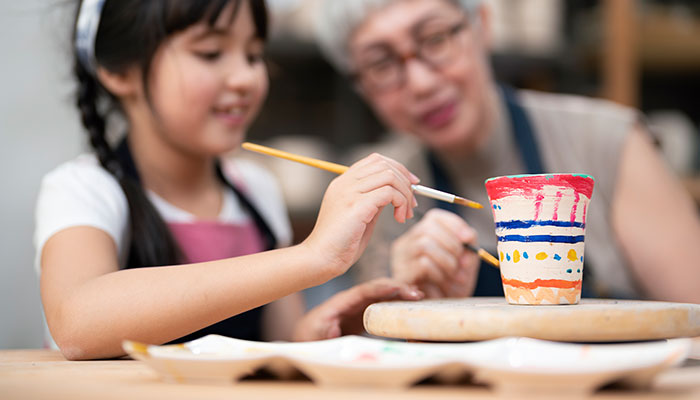
Cerámica recubierta
Los niños explorarán rayas y usarán rayas para decorar su propia cerámica.

Objetivo de la lección
Los niños explorarán la línea como un elemento de arte, y luego usarán líneas para decorar sus propias ollas de arcilla.
(Art) Artes
Lo que necesitará
- Arcilla para modelado (disponible en tiendas de manualidades): 1 pedazo del tamaño de una pelota de béisbol por niño
- Pintura acrílica, póster o témpera: suficiente para que cada niño pinte su cerámica
- Palitos de helado, cucharas de plástico, palillos de dientes o herramientas de arcilla plástica: 1 por niño
- Sellador acrílico transparente o medio de decoupage (disponible en tiendas de manualidades): suficiente para que cada niño cubra completamente su cerámica
- Pinceles: 1 por niño
- Imagen de la Barnes Foundation:
Qué hacer
Nota: Es mejor enseñar esta lección después de la lección Explorar la línea, que se encuentra en este sitio web. La cerámica tardará entre 3 y 4 días en completarse.
- Dígales a los niños que explorarán líneas en cerámica de los indígenas de los Estados Unidos y luego harán sus propias ollas de arcilla y usarán líneas para decorarlas.
- Muestre las obras de arte y pídales a los niños que “observen” (miren atentamente) las decoraciones en cada frasco.
- Pídales a los niños que compartan lo que notaron acerca de las líneas en los frascos (consulte Preguntas de orientación al alumno).
- Pídales que piensen y luego compartan los tipos de líneas que podrían usar para decorar su propia cerámica.
- Demuestre cómo rodar la arcilla en una bola, y luego empuje el pulgar en el centro de la bola hasta que el pulgar esté aproximadamente a ¼" de distancia de la parte inferior del agujero. Ensanche lentamente el agujero pellizcando las paredes hacia afuera y hacia arriba. Voltee la arcilla continuamente a medida que pellizca para mantener las paredes con un espesor uniforme.
- Entregue las bolas de arcilla.
- Ayude a los niños mientras forman sus ollas de arcilla.
- Aplane los fondos suavemente presionando la arcilla contra una superficie plana.
- Utilice palitos de helado, cucharas de plástico, palillos de dientes o herramientas de arcilla plástica para crear líneas como decoraciones.
- Coloque las ollas en un área donde no sean perturbadas, para que puedan secarse por completo. Esto suele tardar entre 2 y 3 días.
- Una vez que las ollas estén secas, pídales a los niños que pinten su obra terminada. Deje que la pintura se seque.
- Aplique dos capas de sellador, permitiendo que la primera se seque antes de aplicar la segunda.
- Permita que la cerámica se seque por completo y pídales a los niños que describan las decoraciones que hicieron en su cerámica.
Recursos
Recursos para la educación en casa
Educadores en casa: utilice estos documentos PDF de lecciones imprimibles para impartir esta lección a sus pequeños que estudian en casa. Están disponibles en inglés y español.
Contenido proporcionado por
Iniciativa de Estándares Básicos Estatales Comunes: Estas lecciones se alinean con los Estándares Básicos Estatales Comunes (Common Core State Standards, CCSS). Los estándares de la CCSS proporcionan una comprensión clara y coherente de los conceptos y habilidades que se espera que los niños aprendan y guían a los maestros para que brinden a sus alumnos las oportunidades de adquirir estas habilidades importantes y conocimientos fundamentales [1]. (External) Visite el CCSS