







Zelle® should only be used to send or receive money with people you know and trust. Before using Zelle® to send money, you should confirm the recipient's email address or U.S. mobile phone number. Neither PNC nor Zelle® offers purchase protection for payments made with Zelle® – for example, if you do not receive the item you paid for, or the item is not as described or as you expected. To send or receive money with Zelle®, both parties must have an eligible checking or savings account at a participating financial institution in the U.S. Transactions typically occur in minutes between enrolled users. If the recipient has not enrolled, the payment will expire after 14 calendar days. See the PNC Zelle Terms of Use for additional terms and conditions. Use of Zelle® is subject to and conditional upon adherence to the terms and conditions of the PNC Zelle® Terms of Use.

Your Guide to Using

Review this page to learn how to use Zelle® with people and eligible businesses you know and trust.[1]
Enroll with Zelle® in the PNC Mobile App[2]
If you don’t have the PNC Mobile app, download it from Google Play or the App Store, then follow the steps to enroll with Zelle®.


- Sign in to the PNC Mobile app.
- Select Pay & Transfer in the bottom navigation menu bar, then select Send Money with Zelle®.
- Read the messages on the Zelle® enrollment screens and select Get Started.
- After reading the Terms of Use, select Agree.
- Select an enrollment method, such as a U.S. mobile number and/or an email address. You may be asked to verify your email address and/or U.S. mobile number.
- If you're already enrolled with Zelle® at a different financial institution, follow the prompts to transfer your mobile number or email address to use with Zelle® at PNC instead.
- Select the PNC account you want to use with Zelle® for sending and receiving payments.
- Review your information to make sure everything’s correct, then select Submit.
Your Zelle® account, U.S. mobile number and email address can all be updated any time in Zelle® Settings.
That’s it! Now you’re ready to use Zelle® with people and businesses you know and trust!
How to Use Zelle®
Review these short videos to learn how to Enroll with Zelle®, Send Money with Zelle®, Receive Money with Zelle®, Request Money with Zelle®, and Split an Expense with Zelle®.
How to Enroll with Zelle®
How to Send Money with Zelle®
How to Receive Money with Zelle®
How to Request Money with Zelle®
How to Split an Expense with Zelle®
Send Money with Zelle®
To send money to people you know and trust using Zelle®, follow the steps below.
If you're sending money to someone for the first time, you'll be asked to verify that it's you by entering a One-time Passcode.
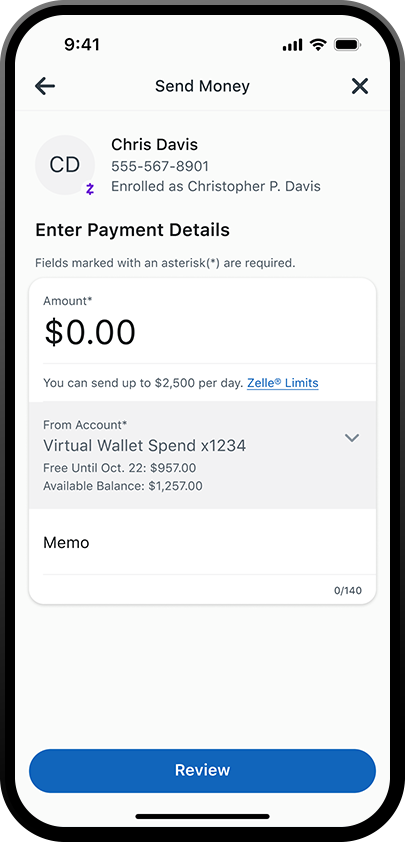
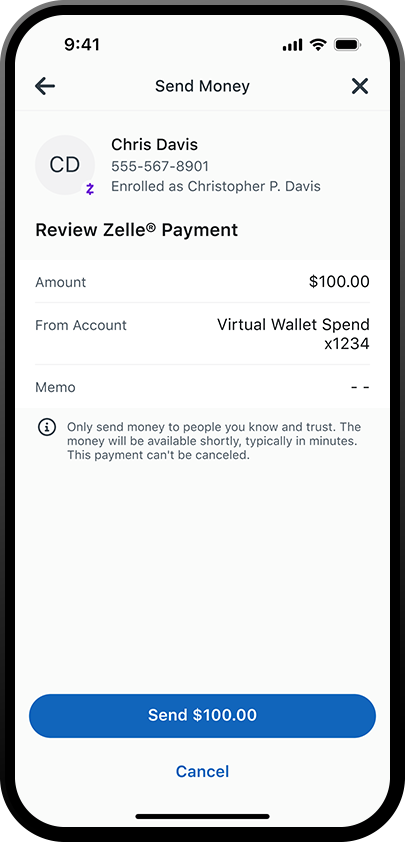
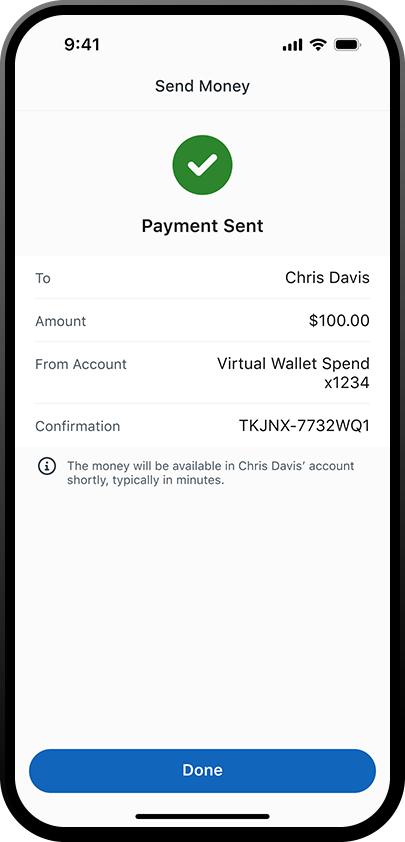
- Step 1: Access Zelle® from your PNC Mobile app.
- Step 2: Enter the email address or U.S. mobile number of the recipient.
- Step 3: Enter the amount you want to send.
Use Zelle® with the PNC Mobile App.
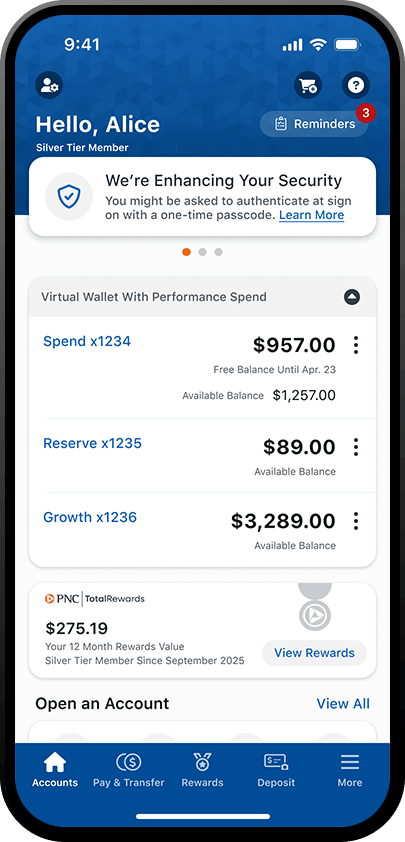
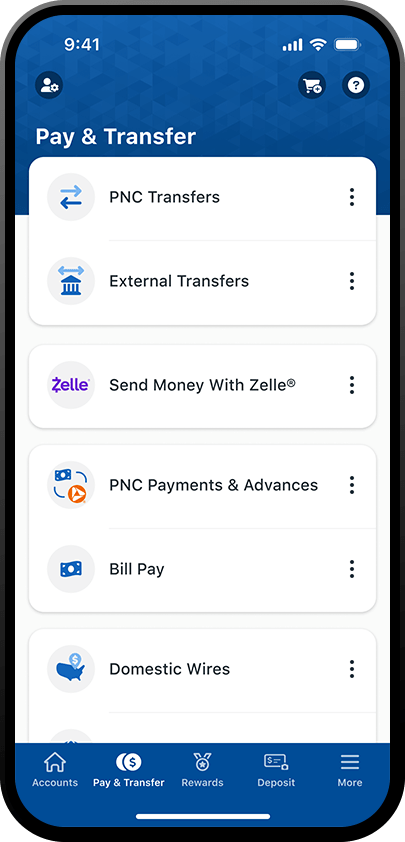
Use Zelle® with the PNC Mobile app.


Your recipient receives a text or email notification explaining how to complete the payment.
Receive Money with Zelle®
NOTE: Enroll with Zelle® using the same email address or U.S. mobile phone number the payment was sent to. You may need to add that contact info to your PNC Online Banking account. After you enroll, you can view the payment in your Zelle® Activity and your PNC Account Activity.
Unenrolled recipients have 14 calendar days to respond to a Zelle® payment notification—if you don’t enroll with Zelle® within 14 days, the payment will expire, and the sender will need to resend the money.
Request Money with Zelle®
To request money from people you know and trust with Zelle®, follow the steps below.
Payment requests can only be sent to enrolled Zelle® users.
- Step 1: Access Zelle® from your PNC Mobile app.
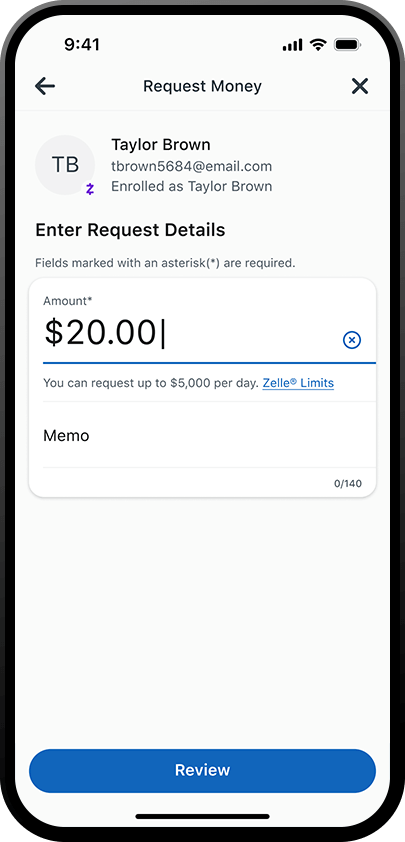
- Step 2: Enter the amount you're requesting.
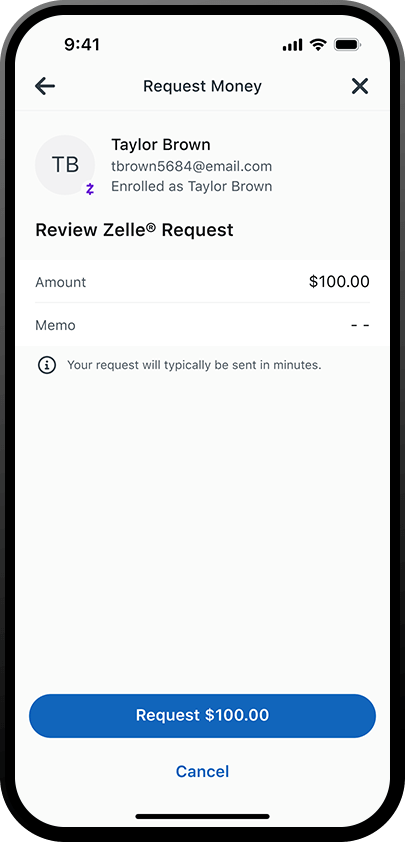
- Step 3: Complete your request.
Use Zelle® with the PNC Mobile app.
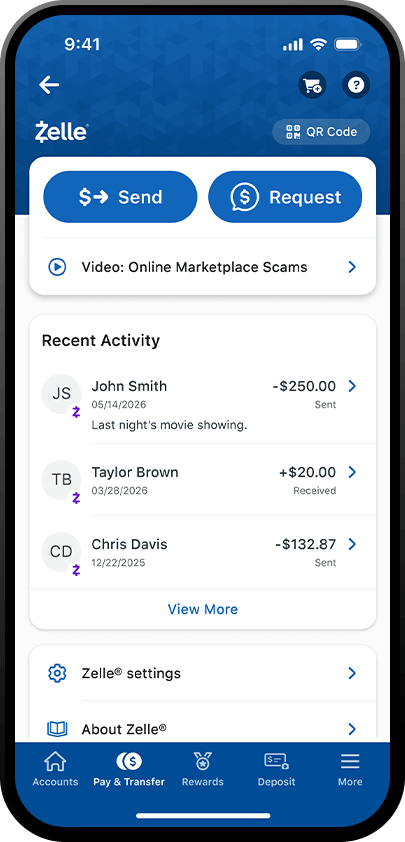
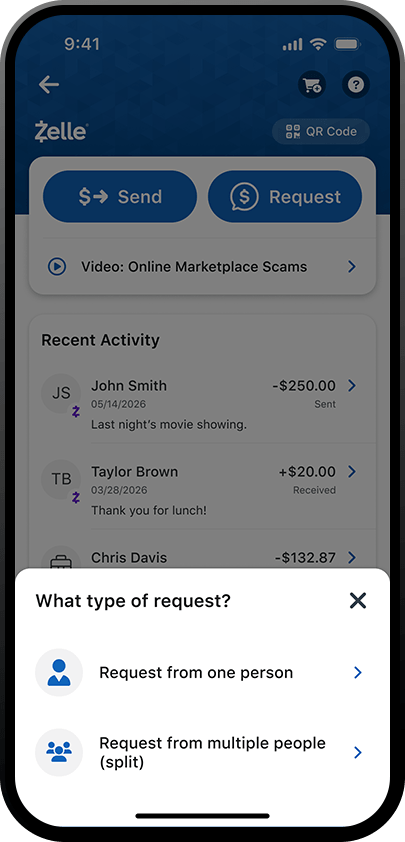
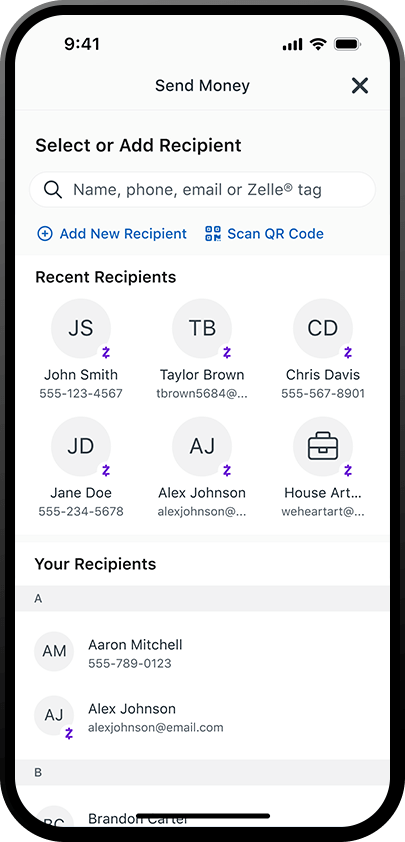
Enter the amount of money you're requesting.
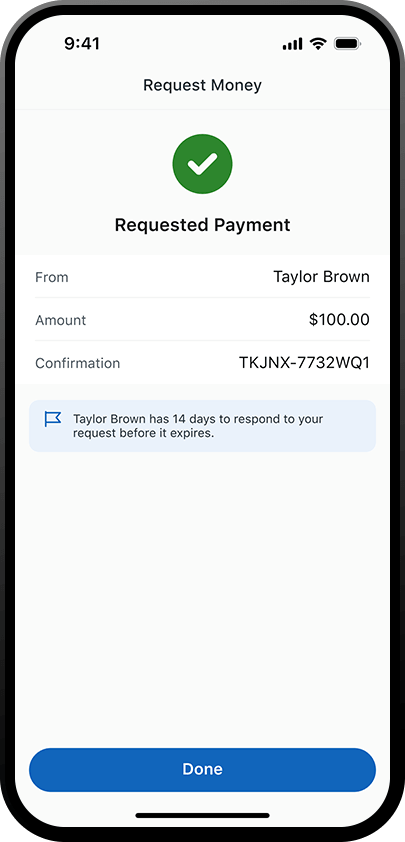
The recipient of your request will receive a text or email notification explaining how to send you money or decline the request.
They'll have 14 days to respond to your request before it expires.
Split an Expense with Zelle®
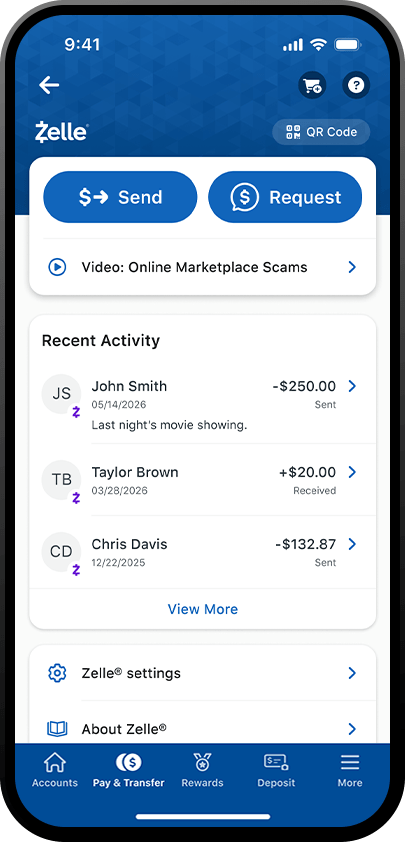
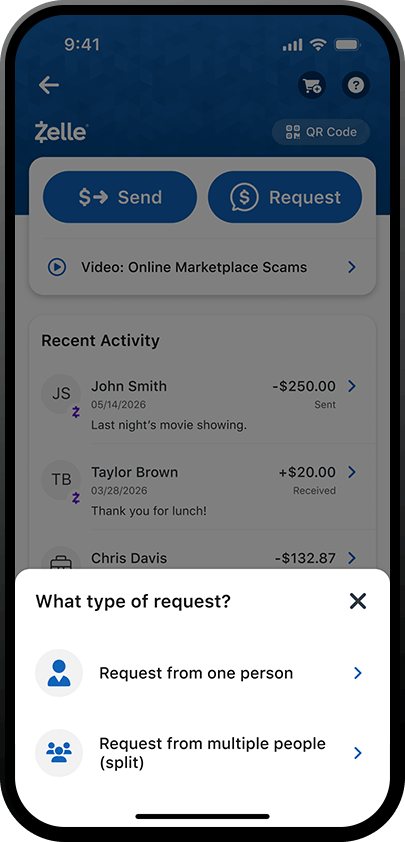
To split an expense with people you know and trust using Zelle®, follow the steps below.
- Step 1: Access Zelle® from your PNC Mobile app.
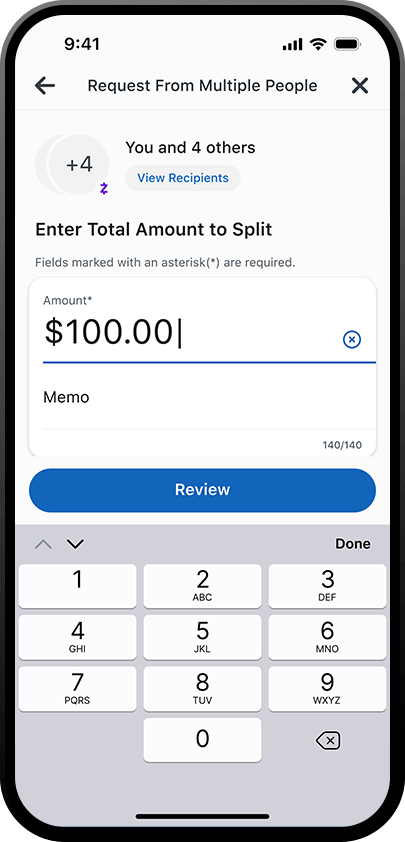
- Step 2: Enter the amount of the expense to split.
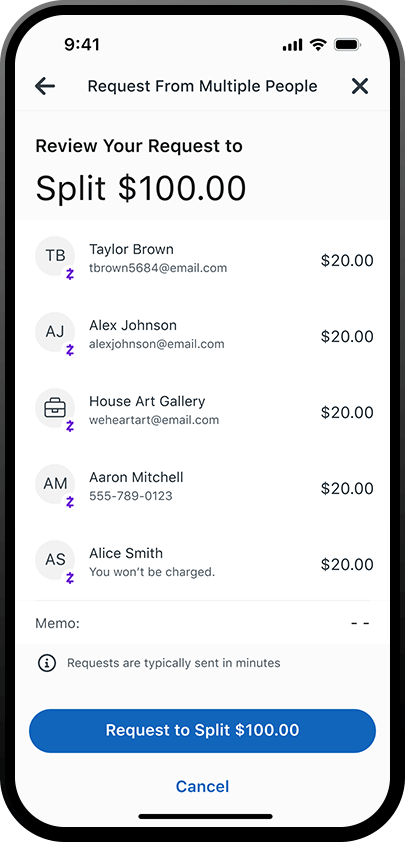
- Step 3: Review and complete your request.
Use Zelle® with the PNC Mobile app.
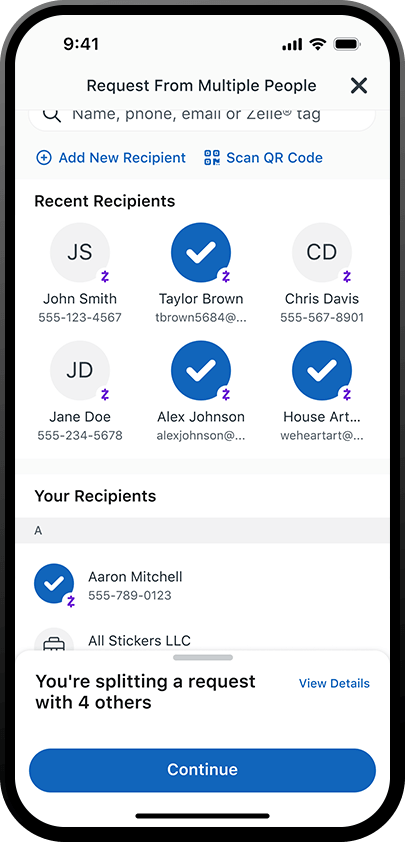
Zelle® will calculate each person’s equal share.
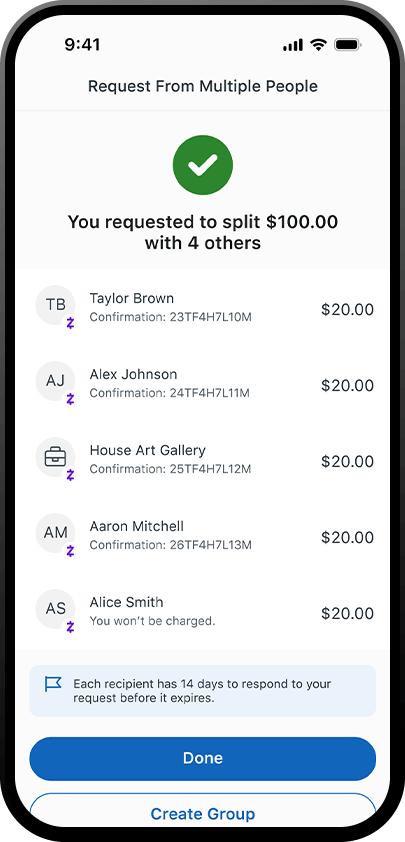
The recipients of your request will receive a text or email notification explaining how to send you money or decline the request.
Each person has 14 days to respond to your split request before it expires.
Use Zelle® QR Codes
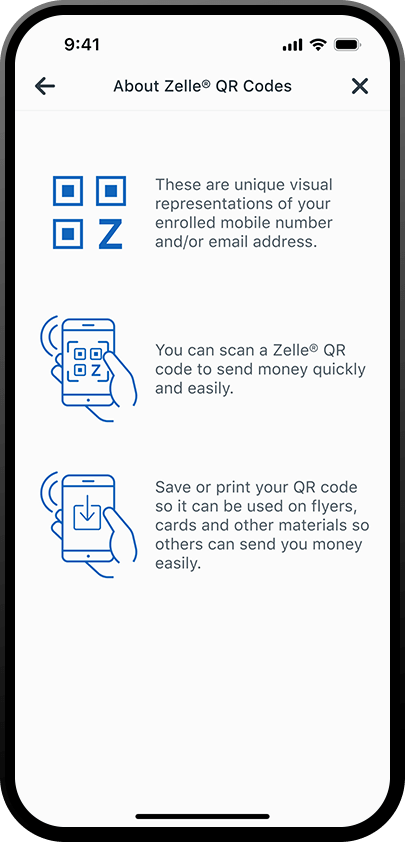
A quick and contactless way to send and receive money without entering or sharing your U.S. mobile number or email address.
Have peace of mind knowing you're sending money to the correct person, without typing an email address or U.S. mobile number. From the PNC Mobile App, you can scan a Zelle® QR Code, easily find a friend, family member, or eligible business—and quickly send them money.
Benefits
- Getting started is easy. The next time you need to pay someone, just ask for their Zelle® QR Code.
- Requesting money is easy—just share your Zelle® QR Code.
- Send money faster by eliminating the need to manually enter contact information.
Remember to only use Zelle® with people and eligible businesses you know and trust.
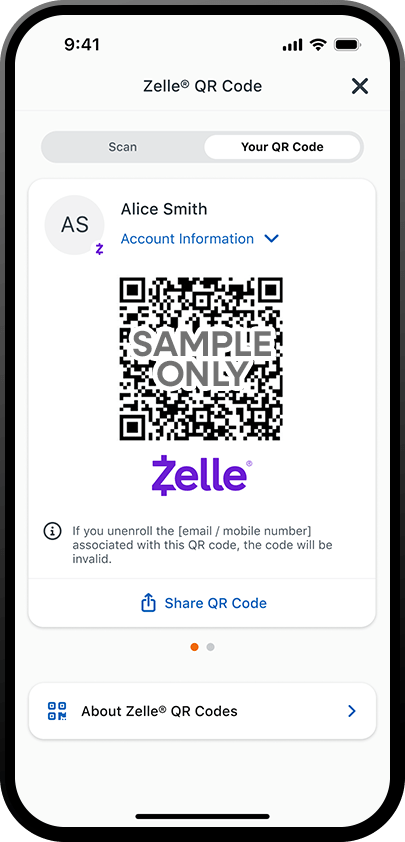
To Send Money:
- Navigate to Zelle® in the PNC Mobile app and select the QR Code icon at the top right of the screen.
- Allow PNC access to your device's camera if asked.
- Your phone’s camera will open. Point your camera at the recipient’s Zelle® QR Code.
- Enter the amount, select Review then Send, and the money is on the way!
To Receive Money:
- Navigate to Zelle® in the PNC Mobile app and select the QR code icon at the top right of the screen.
- Select the Your QR Code tab.
- You can then show your device to someone paying you so they can scan your code. You can also select Share QR Code to share icons to text, email or print.
You can have one Zelle® QR Code for each enrolled contact method.
To find your Zelle® QR Code, navigate to Zelle® in the PNC Mobile app, select the QR code icon at the top right of the screen, select the Your QR code tab, then swipe to see any additional Zelle® QR codes.
If you are not enrolled with Zelle®, scanning a Zelle® QR Code will not enroll you with Zelle®. Prior to scanning a Zelle® QR Code, you should open the PNC Mobile App, navigate to Zelle® and follow the prompts to enroll. Once enrolled, you can scan the Zelle® QR Code from within the PNC Mobile App.
If a friend’s bank or credit union does not offer the ability to scan a Zelle® QR Code, your friend can still send you money with Zelle® using your enrolled email address or U.S. mobile number.
No, each Zelle® QR Code is specific to an individual U.S. mobile number or email address. If you change your U.S. mobile number or email address, the Zelle® QR Code will change. You must share your new Zelle® QR Code to receive money. Money sent to a Zelle® QR Code that is not associated with an enrolled U.S. mobile number or email address will not be delivered unless you re-enroll the U.S. mobile number or email address associated with the Zelle® QR Code.
If you do not re-enroll the U.S. mobile number or email address previously associated with that Zelle® QR Code, the payment will expire after 14 days.
If you no longer have access to the mobile number or email address, the sender should cancel the payment and send money using the new Zelle® QR Code.